INDESIGN is a compression software in which i takes all of the graphics i have saved from photoshop and adds them together to create a collabrative piece of work.
Firstly i opened up Adobe INDESIGN and created a new document. I changed it to an A3 Page so that if i wanted to make the poster bigger, i can without messing up the graphics and making them all pixelized.

To find a high quality JPEG you must look at the image you are hunting for, then check the resolution. Anything higher than 2 mega pixel is good.
The higher the resolution, the better the image quality is.
In this picture it is underlined in Red.

I then went into Photoshop and started with the background using these two images.
The first image i found on the internet in which i found a high quality JPEG file so that it can be enlarged and not loose its quality.


The second image i made by myself with a 3 megapixel camera and a lamp underneith to make it look more vibrant and bold.
Firstly i opened the two images side by side each other, and then rotated the blurry lights image so that its Portrait like my other image that i made myself.

(WARNING: Create a second background image and put it on the "Exclusion" blend tool first!)
I then copied and placed the image onto my other image like so:

The image is smaller than the other image to begin with but if you transform it (CTRL + T) to make it bigger so that it overlaps the whole image.

Then i did the same thing in which i chose the screen blend tool to make it match my CD Cover.

I then saved it as a normal photoshop file (PSD file) cant just be copied and pasted into INDESIGN. I then placed it into my INDESIGN document after creating a new layer and naming it "Background".


After i placed the image into place, i transaformed it a little so that it fitted in my margin lines.
I then created a layer called "image" and placed my image into place by rotating it and making it smaller.

I then created a "Title and Subtitle" layer to when i am going to all my Title and Subtitle to the top of the poster.
Back to photoshop, i created another document and made it transparent.
After that i chose my desired syle (refer to CD Cover post) and then saved it.
As i cant just copy and paste this actual piece into INDESIGN sadly, (Like i said earlier) so each piece has to be saved and then placed into INDESIGN as you can see below.


Above is the Document in which you create your transparent titles - Save them as a photoshop document and then place them into your INDESIGN poster. File -> Place.

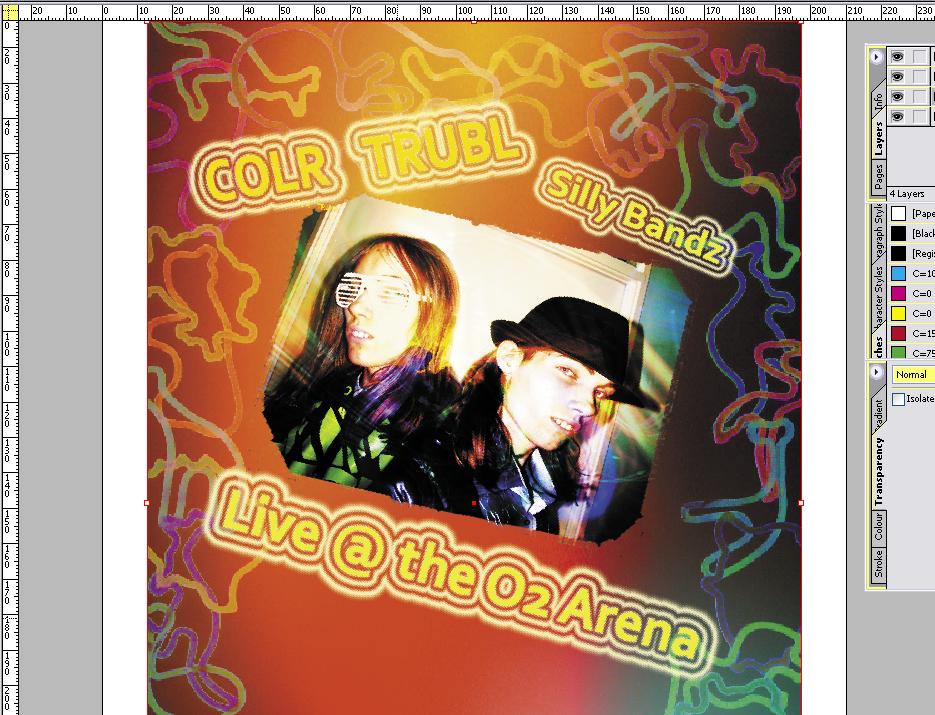
Here is how it looks after 3 titles have been added (above) and below is the version with the same steps being taken over and over to create different titles.

And here is the finished product below.

No comments:
Post a Comment